An internal validation leaderboard in Neptune
Internal validation is a useful tool for comparing results of experiments performed by team members in any business or research task. It can also be a valuable complement of public leaderboards attached to machine learning competitions on platforms like Kaggle.
In this post, we present how to build an internal validation leaderboard using Python scripts and the Neptune environment. As an example of a use case, we will take the well known classification dataset CIFAR-10. We study it using a deep convolutional neural network provided in the TensorFlow tutorial.
Why internal leaderboard?
Whenever we solve the same problem in many ways, we want to know which way is the best. Therefore we validate, compare and order the solutions. In this way, we naturally create the ranking of our solutions – the leaderboard.
We usually care about the privacy of our work. We want to keep the techniques used and the results of our experiments confidential. Hence, our validation should remain undisclosed as well – it should be internal.
If we keep improving the models and produce new solutions at a fast pace, at some point we are no longer able to manage the internal validation leaderboard manually. Then we need a tool which will do that for us automatically and will present the results to us in a readable form.
Business and research projects
In any business or research project you are probably interested in the productivity of team members. You would like to know who and when submits his or her solution to the problem, what kind of model they use and how good the solution is.
A good internal leaderboard stores all that information. It also allows you to search for submissions sent by specific user, defined in some time window or using a particular model. Finally, you can sort the submissions with respect to the accuracy metric to find the best one.
Machine learning competitions
The popular machine learning platform, Kaggle, offers a readable public leaderboard for every competition. Each contestant can follow his position in the ranking and try to improve several times a day.
However, an internal validation would be very useful for every competing team. A good internal leaderboard has many advantages over a public one:
- the results remain exclusive,
- there is no limit on the number of daily submissions,
- metrics other than those chosen by the competition organizers can be evaluated as well,
- the submissions can be tagged, for example to indicate the used model.
Note that in every official competition the ground truth labels for the test data are not provided. Hence, to produce the internal validation we are forced to split the available public training data. One part is used to tune the model, the other is needed to evaluate it internally. This division can be an origin of unexpected problems (e.g., data leaks) so perform it carefully!
Why Neptune?
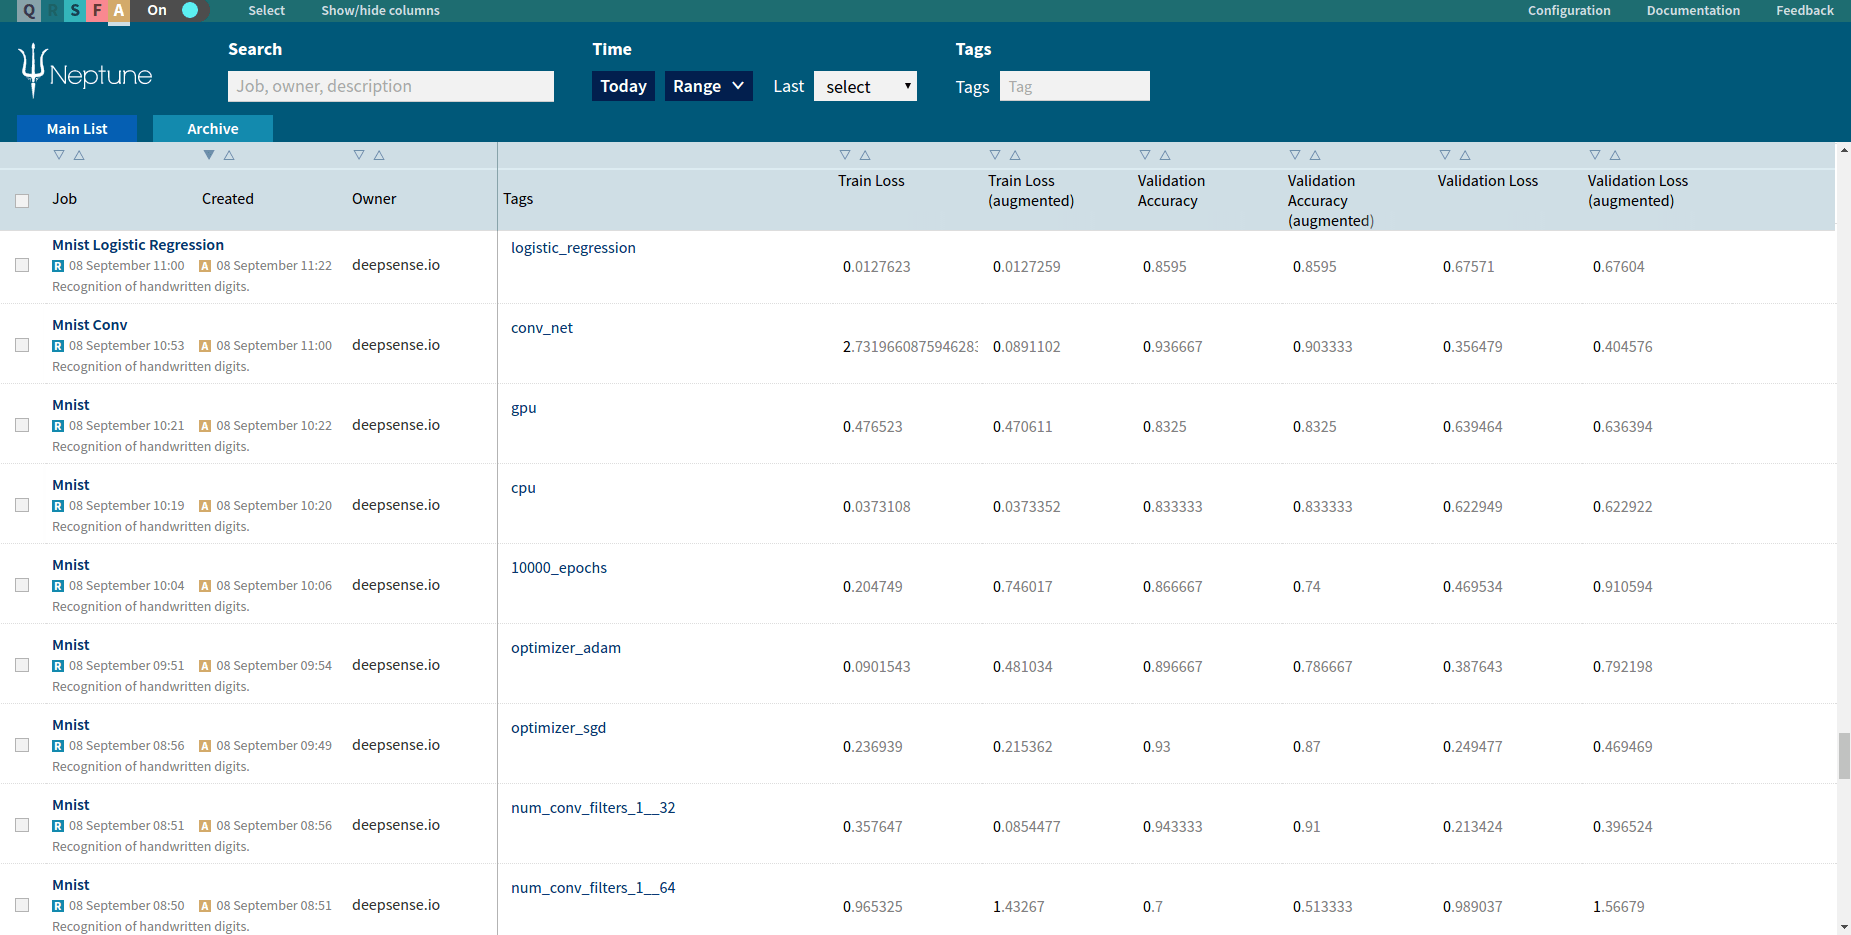
Neptune was designed to manage multiple experiments. Among many features, it supports storing parameters, logs and metric values from various experiment executions. The results are accessible through an aesthetic Web UI.
In Neptune you can:
- gather experiments from various projects in groups,
- add tags to experiments and filter by them,
- sort experiments by users, date of creation, or – most importantly for us – by metric values.
Due to that, Neptune is a handy tool for creating an internal validation leaderboard for your team.
Tracking a TensorFlow experiment in Neptune
Let’s do it!
Let’s build an exemplary internal validation leaderboard in Neptune.
CIFAR-10 dataset
We use the well-known classification dataset CIFAR-10. Every image in this dataset is a member of one of 10 classes, labeled by numbers from 0 to 9. Using the train data we build a model which allows us to predict the labels of images from test data. CIFAR-10 is designed for educational purposes, therefore the ground truth labels for test data are provided.
Evaluating functions
Let’s fix the notation:
- \(N\) – number of images we have to classify.
- \(c_i\) – class to which the \(i\)th image belongs; \(iin{0,ldots,N-1}\), \(c_iin{0,ldots,9}\).
- \(p_{ij}\) – estimated probability that the \(i\)th image belongs to the class \(j\); \(iin{0,ldots,N-1}\), \(jin{0,ldots,9}\), \(p_{ij}in[0,1]\).
We evaluate our submission with two metrics. The first metric is the classification accuracy given by
\(frac 1Nsum_{i=0}^{N-1}mathbb{1}Big(argmax_j p_{ij}=c_iBig)\)
This is the percentage of labels that are predicted correctly. We would like to maximize it, the optimal value is 1. The second metric is the average cross entropy given by
\(-frac 1Nsum_{i=0}^{N-1}log p_{ic_i}\)
This formula is simpler than the principal entropy since the classes are completely mutually exclusive. We would like to minimize it, preferably to 0.
Implementation details
Prerequisites
To run the code we provide you need the following software:
- Neptune: apply for our Early Adopters Program or try it immediately with Neptune Go,
- TensorFlow 1.0.
Repository
The code we use is based on that available in the TensorFlow convolutional neural networks tutorial. You can download our code from our GitHub repository. It consists of the following files:
| File | Purpose |
|---|---|
| main.py | The script to execute. |
| cifar10_submission.py | Computes submission for a CIFAR-10 model. |
| evaluation.py | Contains functions required to create the leaderboard in Neptune. |
| config.yaml | Neptune configuration file. |
Description
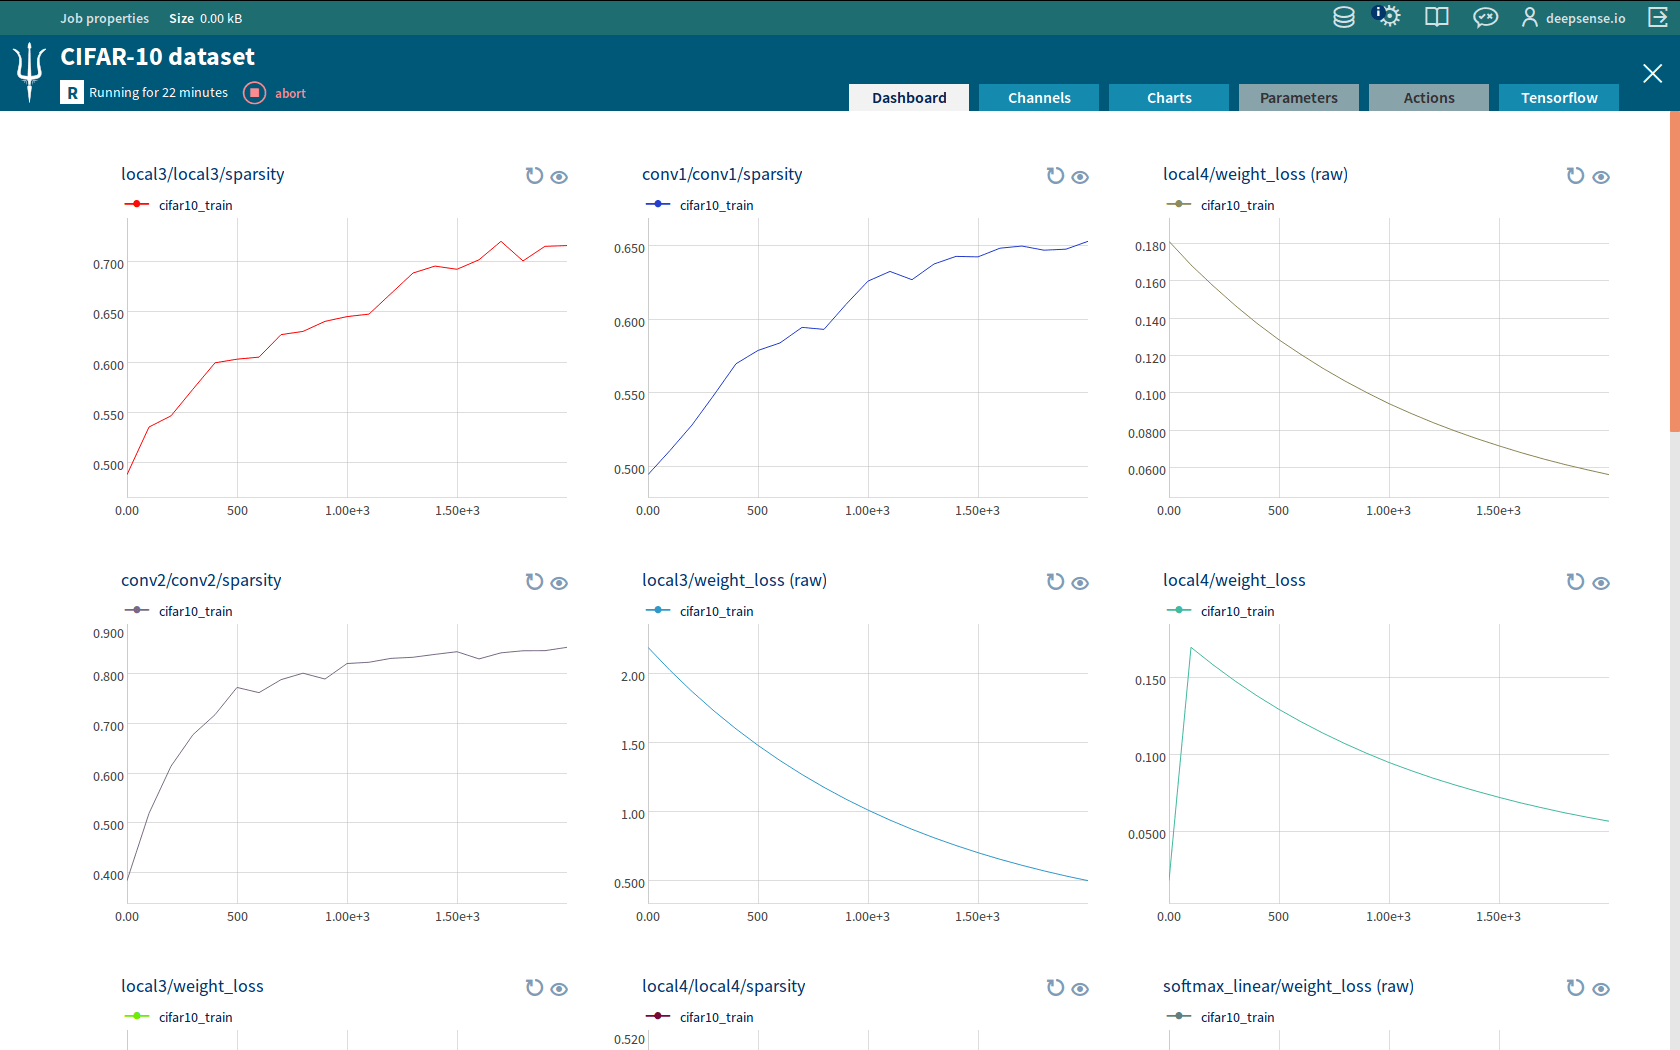
When you run main.py, you first train a neural network using function cifar10_train provided by TensorFlow. We hard-coded the number of training steps. This could be enhanced to dynamic using Neptune action, but for the sake of brevity we skip this topic in the blog post. Due to TensorFlow Integration you can track the tuning of the network in Neptune. Moreover, the parameters of the tuned network are stored in a file manageable by TensorFlow saver objects.
Then function cifar10_submission is called. It restores parameters of the network from the file created by cifar10_train. Next, it forward-propagates the images from the test set through the network to obtain a submission. The submission is stored as a Python Numpy array submission of the shape \(Ntimes 10\), the \(i\)th row contains estimated probabilities \(p_{i0},ldots,p_{i9}\). The ground truth labels forms a Python Numpy array true_labels of the shape \(Ntimes 1\), the \(i\)th row contains label \(c_i\).
Ultimately, for given submission and true_labels arrays function evaluate_and_send_to_neptune from script evaluation.py computes metric values and sends them to Neptune.
File config.yaml is a Neptune job configuration file, essential for running Neptune jobs. Please download all the files and place them in the same folder.
Step by step
We create a validation leaderboard in Neptune in 4 easy steps:
- Creating a Neptune group
- Creating an evaluation module
- Sending submissions to Neptune
- Customizing a view in Neptune’s Web UI
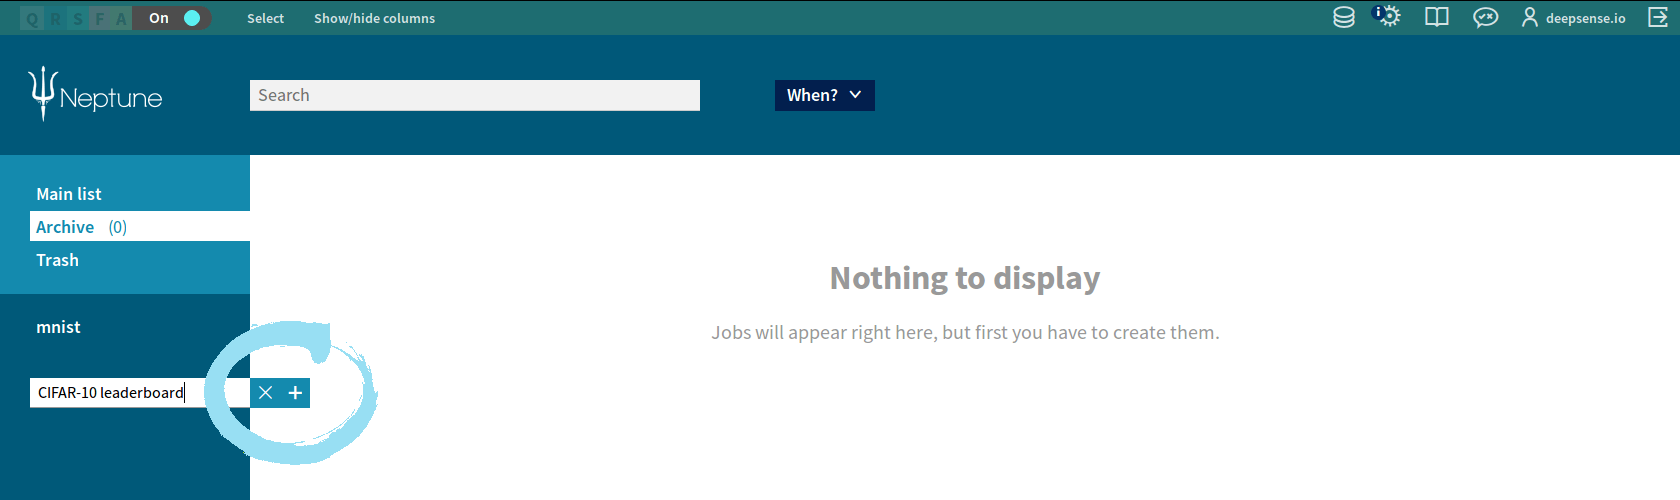
1. Creating a Neptune group
We create the Neptune group where all the submissions will be stored. We do this as follows:
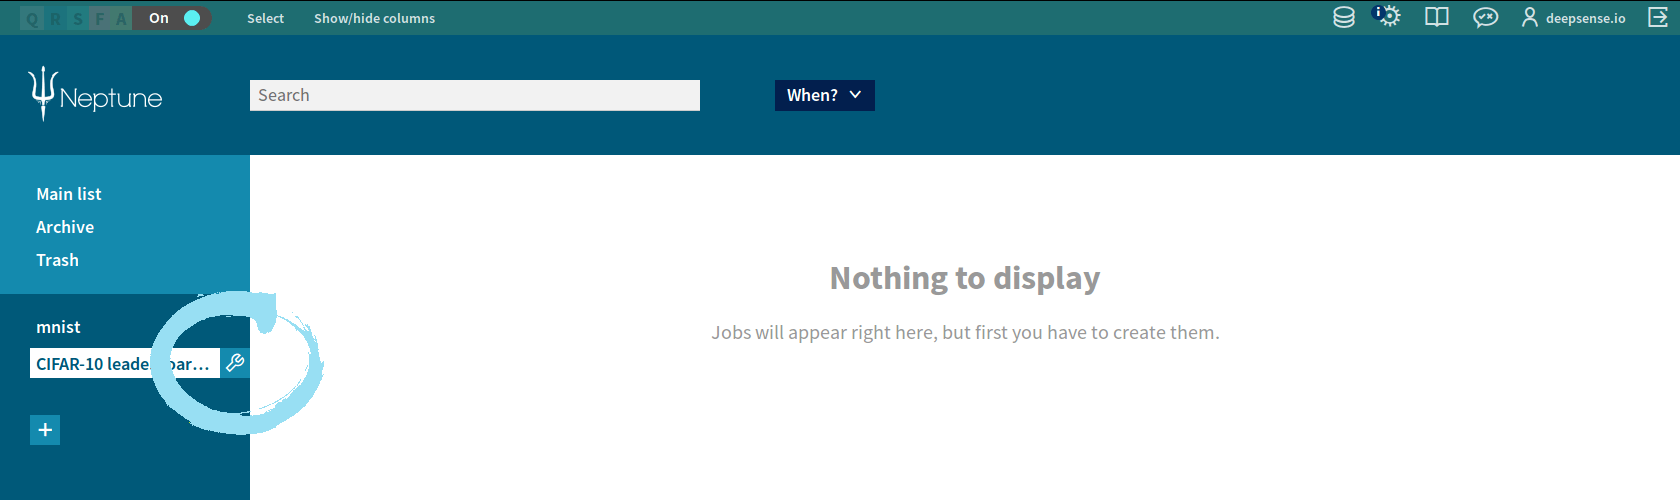
- Enter the Neptune home screen.
- Click
 in the lower left corner, enter the name “CIFAR-10 leaderboard”, click again.

- Choose “project” “is” and type “CIFAR-10”, click “Apply”.

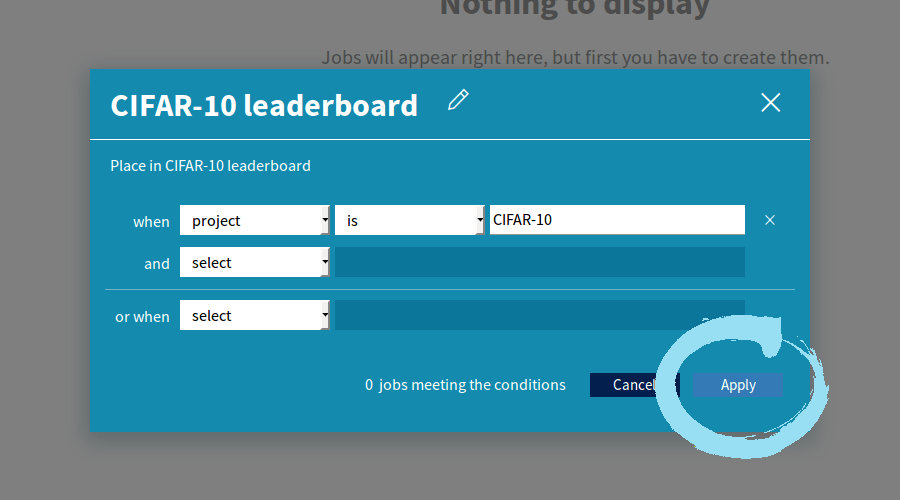
Our new group appears in the left column. We can edit or delete it by clicking the ![]() icon next to the group name.
icon next to the group name.
2. Creating an evaluation module
We created the module evaluation.py consisting of 5 functions:
- _evaluate_accuracy and _evaluate_cross_entropy compute the respective metrics,
- _prepare_neptune adds tags to the Neptune job (if specified – see Step 4) and create Neptune channels to send evaluated metrics,
- _send_to_neptune sends metrics to channels,
- evaluate_and_send_to_neptune calls the above functions.
You can easily adapt this script to evaluate and send any other metrics.
3. Sending submissions to Neptune
To place our submissions in the Neptune group, we need to specify project: CIFAR-10 in a Neptune config file config.yaml . This is a three-line-long file, it also contains project name and a description.
Assume that the files from our repository are placed in the folder named leaderboard . The last preparation step we have to do is clone CIFAR-10 scripts from the TensorFlow repository. To do it, we go to the folder above folder leaderboard and type:
git clone https://github.com/tensorflow/models/
export PYTHONPATH="$PWD/models/tutorials/image/cifar10:$PYTHONPATH"
Now we are ready to send our results to the leaderboard created in Neptune! We run the script main.py from the folder above folder leaderboard by typing
neptune run leaderboard/main.py --config leaderboard/config.yaml --dump-dir-url leaderboard/dump --paths-to-dump leaderboard
using Neptune CLI. The script executes for about half an hour on a modern laptop. Training would be significantly faster on a GPU.
There are only 5 lines related to Neptune in the main.py script. First we load the library:
from deepsense import neptune
Then we initialize a Neptune context:
ctx = neptune.Context()
Next, command
ctx.integrate_with_tensorflow()
automatically creates and manages Neptune channels related to TensorFlow SummaryWriter objects. Thereby, we can observe the progress of our network in the Neptune Dashboard. Finally, in lines
tags = ["tensorflow", "tutorial"]
evaluation.evaluate_and_send_to_neptune(submission, true_labels, ctx, tags)
we evaluate our submission and send metric values to dedicated Neptune channels. tags is a list of tags which we can add to the Neptune job. In this way, we attach some keywords to the Neptune job. We can easily filter jobs by tags in the Neptune Web UI.
4. Customizing a view in Neptune’s Web UI
If the job has been successfully executed, we can see our submission in the Neptune group we created. One more thing worth doing is setting up the view of columns.
- Click “Show/hide columns” in the upper part of the Neptune Web UI.
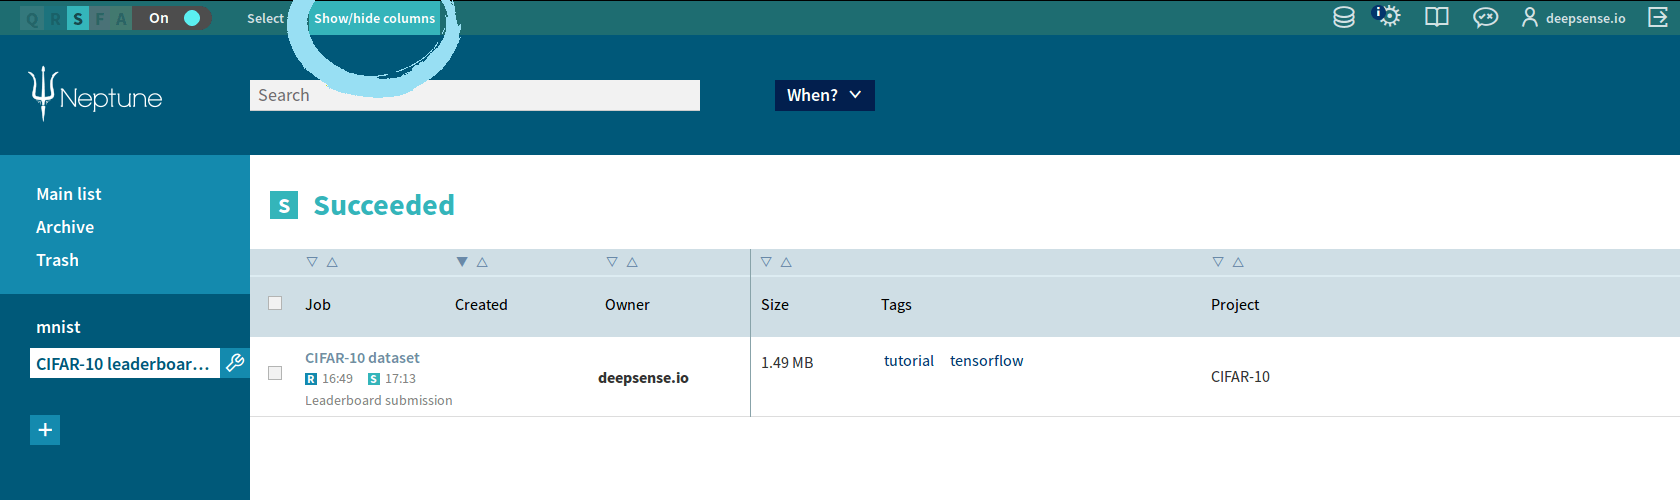
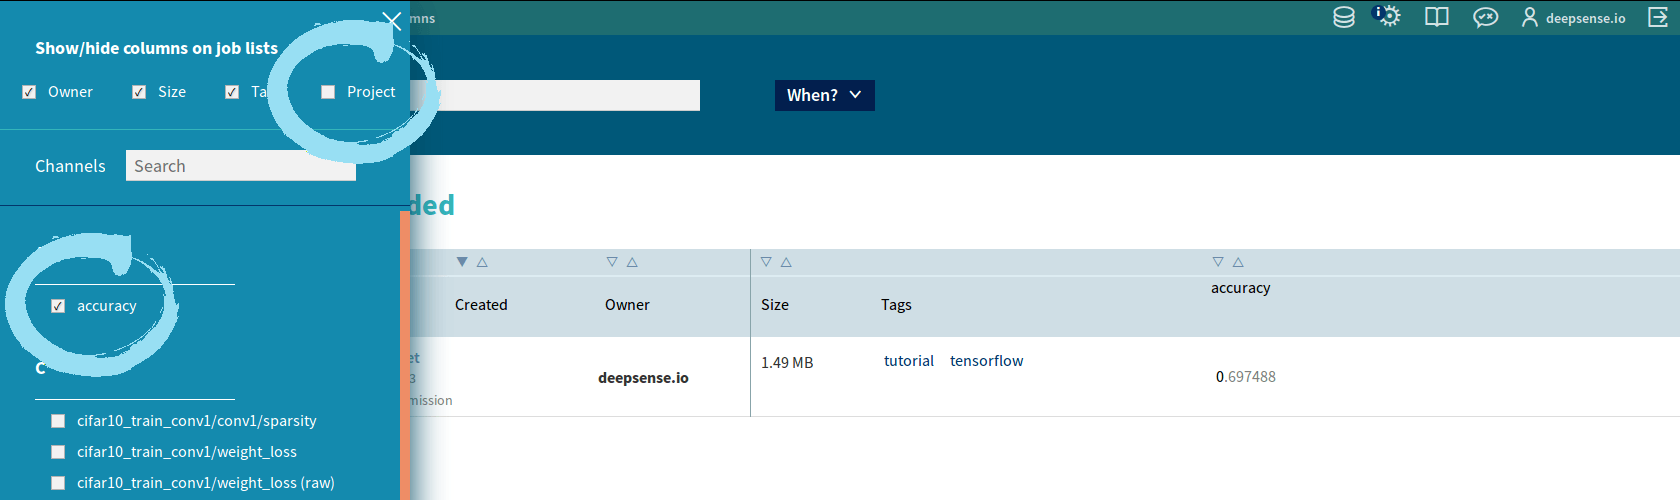
- Check/uncheck the names. You should:
- uncheck “Project” since all the submissions in this group come from the same project CIFAR-10,
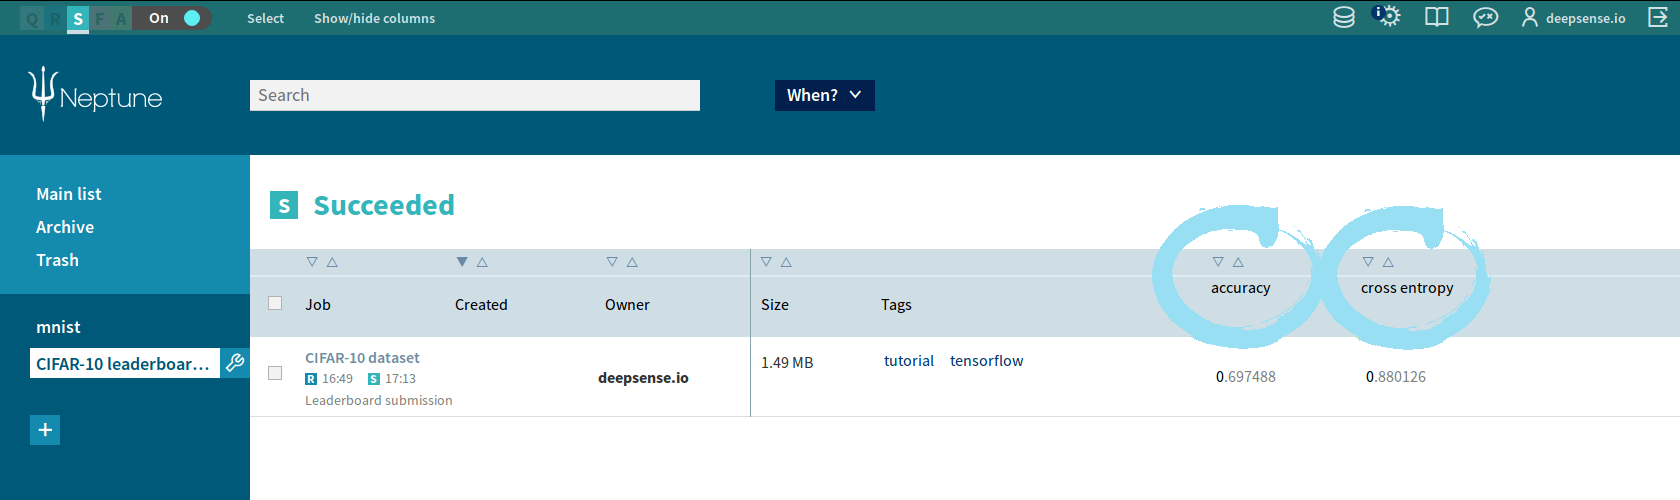
- check channel names “accuracy” and “cross entropy” because you want to sort with respect to them.


You can sort submissions by accuracy or cross entropy value by clicking the triangle over the respective column.
Summary
That’s all! Now your internal validation leaderboard in Neptune is all set up. You and your team members can compare your models tuned up to the CIFAR-10 dataset. You can also filter your results by dates, users or custom tags.
Of course, CIFAR-10 is not the only possible application of the provided code. You can easily adapt it for other applications like: contests, research or business intelligence. Feel free to use an internal validation leaderboard in Neptune wherever and whenever you need.